
In this tutorial, I’ll teach you how to set up a WooCommerce + WordPress online store where you can list and sell physical products.
At the end of this tutorial, your e-commerce site should be something similar to this image on the right:
P.S. If you plan to sell services (instead of products), I recommend starting a business website (not an online store).
If you’re planning to sell more than 10 different products, keep reading.
Use WordPress + WooCommerce for online store (FREE)
In a sentence, WooCommerce is the best way to turn your WordPress website into a fully functional e-commerce store. Here are the specifics:
- Technically speaking, WooCommerce is a WordPress plugin. It needs to be installed and activated just like any other plugins in order to function.
- It’s free and open source – just like WordPress. You don’t need any licenses, things don’t expire and no one comes asking for money at any point.
- It’s the most popular e-commerce plugin for WordPress out there.
- It’s (arguably) the most feature-rich plugin of that kind too.
- You can set it up and configure it by yourself.
- The setup is fast. Usually, it’s just a matter of an afternoon.
- It works with any design/theme you currently have on your WordPress site – you don’t need to ditch your current website design!
I could continue with the list above, but instead, let me just say that WooCommerce simply gives you all you could ever need for building a high-quality e-commerce store with WordPress.
What can you sell with WordPress + WooCommerce?
Hmm.. a lot:
- digital products (e.g. software, downloads, ebooks),
- physical products,
- services,
- bookings (e.g. for appointments, or anything else that can be booked),
- subscriptions,
- other people’s products – as an affiliate,
- customizations (e.g. additional customizations on top of your product listings), and more.
I would even risk saying that WooCommerce allows you to sell anything that can have a price tag assigned to it. On top of that, anyone can use it (if you’ve already managed to get a WordPress site launched, you will also be able to handle WooCommerce).
How to build an online store with WordPress and WooCommerce
Note: The goal of this part of the guide is to show you the simplest method of building a functional e-commerce store on WordPress so that you can get your store online as soon as possible. That is why I’m going to focus on just the essential things and skip the more advanced aspects.
STEP 1. Get a domain name and web hosting
In order to create an online store or any other type of website, you’re going to need two things:
- Domain name is your store’s unique address on the web. Something like
YOURSTORE.com - Web Hosting is basically a remote computer that stores your website and then serves it to whoever wants to visit it. (more detailed explanation)
Full disclosure: I earn a commission whenever you end up purchasing Bluehost. This helps me to run WebsiteSetup as a business. Thanks for your support.
There are hundreds of different hosting/domain providers, I usually get both from Bluehost.com. They offer affordable web hosting (including free domain name for a year) and reliability. They’re also one of the few recommended (official) hosting providers by WordPress.org.
Cost? Starting from $2.75/mo! 
For Bluehost alternatives, check top 10 WordPress hosts.
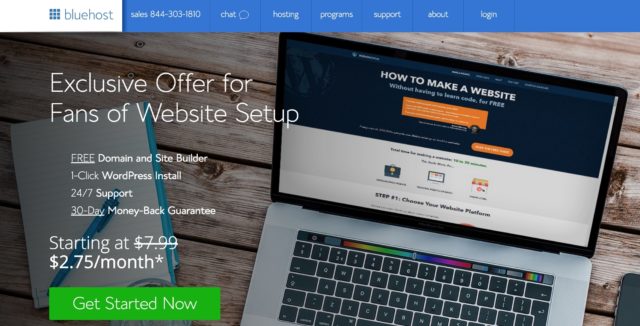
To begin with, you just need to go to Bluehost.com, and click the “get started” button.
This will take you to a page where you can select a hosting plan for your store. You can get started with the cheapest option, labeled “basic”:
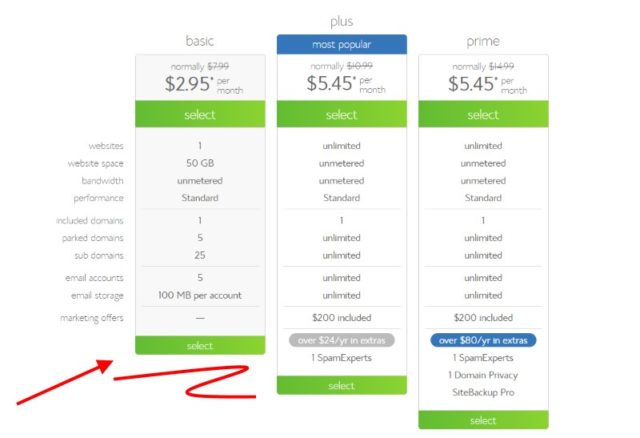 If you use our referral links, you can get Bluehost for $2.75/mo.
The next step is all about picking a domain name for your new online store.
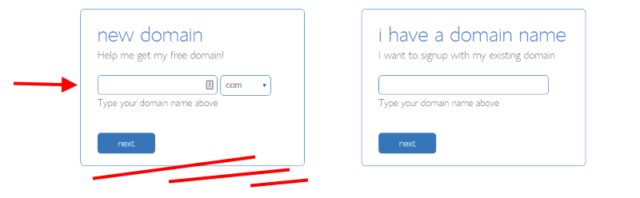
This requires some brainstorming. In general, you want your domain name to be unique, easy to remember and catchy. If you already have a business entity set up for your store, you should perhaps go with that as your domain name.
Once you make your domain choice, you can finalize the setup and pay the initial hosting fee.
Great! You’ve just got yourself a domain name and a hosting plan to go along with it.
STEP 2. Install WordPress (FREE)
The next step officially marks the start of your adventure with WordPress – you’re going to install WordPress on your hosting account.
This might sound difficult, but it’s actually not. All you have to do is to go to your Bluehost user panel (Bluehost will send you a link in the confirmation email) – usually available at my.bluehost.com.
Once there, scroll down until you see an icon labeled “Install WordPress”:
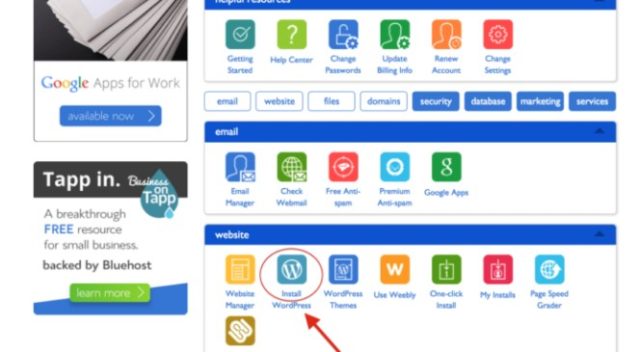
Click on it and follow the on-screen instructions. You will be taken through the whole process step-by-step, there’s nothing to worry about!
If you need more hands-on info on picking a domain and installing a clean copy of WordPress, please go ahead and visit this guide (scroll to steps 2).
At this point, you should have a blank WordPress website installed.
- You can see it by going to your main domain name (e.g.,
YOURSTORE.com) - You can log in to the admin panel by going to
YOURSTORE.com/wp-admin
Now it’s time to turn that blank WordPress website into a fully functional e-commerce store using the excellent WooCommerce plugin.
STEP 3. Install WooCommerce Plugin (FREE)
Like with all WordPress plugins, the fun starts by navigating to your WordPress Dashboard / Plugins / Add New. Once there, type “woocommerce” in the search field. You’ll see WooCommerce as the first search result:
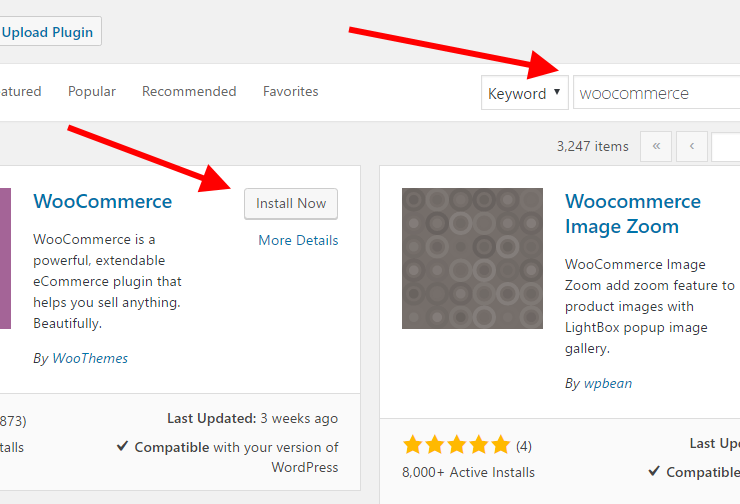
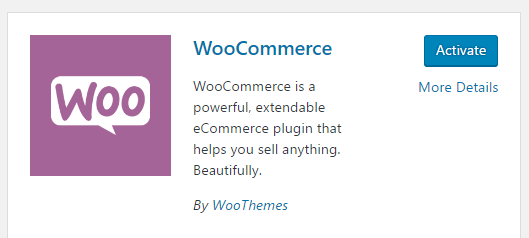
Just click the “Install Now” button next to the plugin.
After a couple of seconds, the text on the button will change to “Activate.” Go ahead and click it.
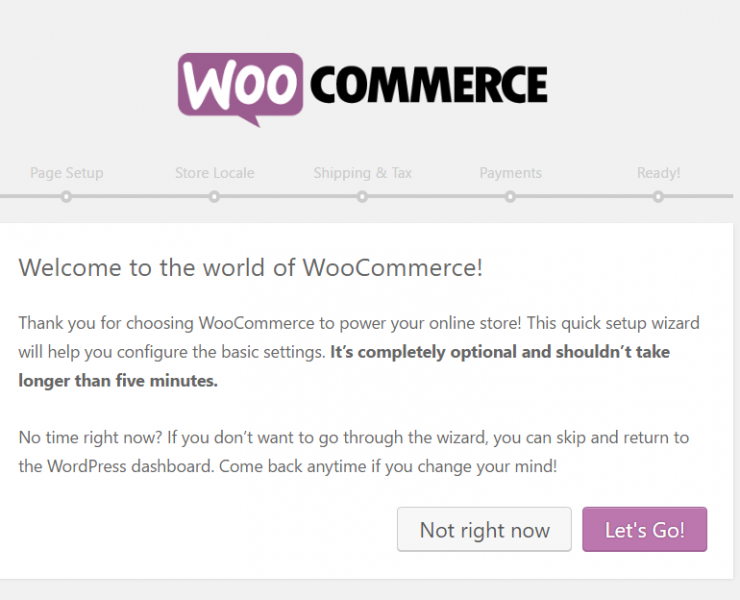
At this stage, you’ll see WooCommerce’s on-screen launch/setup wizard. This thing makes the process uber-easy and takes you by the hand through everything. To start, click “Let’s Go!”
Create the essential store pages
Online stores are a particular kind of website, and they need some particular pages to function properly. The first step in the WooCommerce wizard is about creating these pages for you:
- “Shop” – this is where your products are going to be displayed.
- “Cart” – this is the shopping cart where your customers can adjust their order before proceeding to checkout.
- “Checkout” – this is where the customers choose the shipping/delivery method and pay for whatever they’ve bought.
- “My Account” – a kind of a profile page for registered customers (they will be able to view their past orders there and manage other details).
All you need to do at this stage of the WooCommerce wizard is click the “Continue” button. WooCommerce will set up those pages for you.
Set up locale
The locale is a truly crucial part of your store setup. Those few parameters define your business origin, currency, and preferred units:
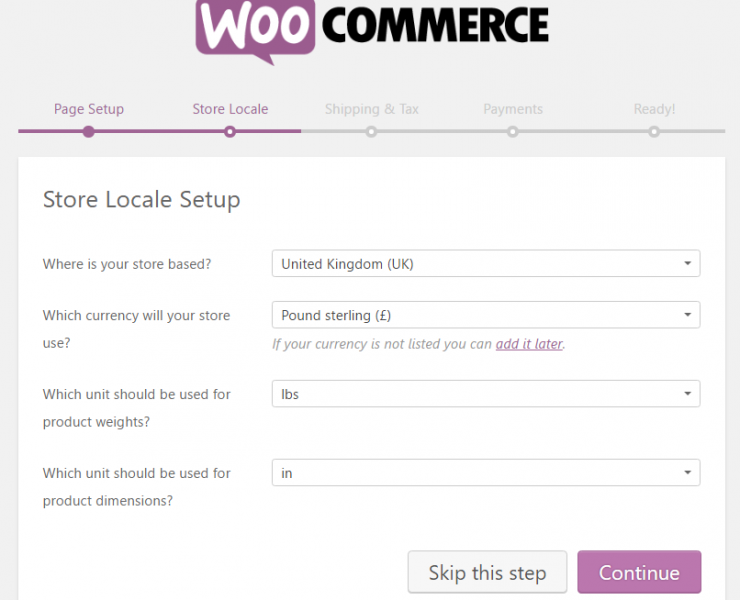
Once you’re done, click “Continue”.
Understand Sales Tax
Tax is by far the least exciting part of running an e-commerce store, but it’s also something we can’t disregard, sadly.
You’re going to be pleased to see that WooCommerce helps you with this part too.
First, you can select if you’re going to be shipping physical goods or not. If you check the box, WooCommerce will pre-set the remaining shipping-related details in the settings.

Next, tax! WooCommerce has a very neat tax module, the best thing about it is that it helps you figure out the tax rates based on your store location (you’ve set it in the previous step).
If you’re going to charge sales tax (in most cases you are), just check the main tax box. As soon as you do this, a new set of boxes will appear and inform you of what’s going to happen next.
Note: Even though WooCommerce will pre-fill the tax settings for you, you still need to double-check with your local authorities what the actual current taxation rules are, especially if you’re not in the US. To learn more about WooCommerce’s way of handling sales taxes, read this. You can change everything later, so don’t worry if you’re not sure about the rules right now.
Click “Continue.”
Pick a Payment Method (PayPal is recommended)
Being able to accept online payments is at the core of any e-commerce store, WooCommerce really offers a lot in terms of the available solutions.
Here’s what you can choose from:
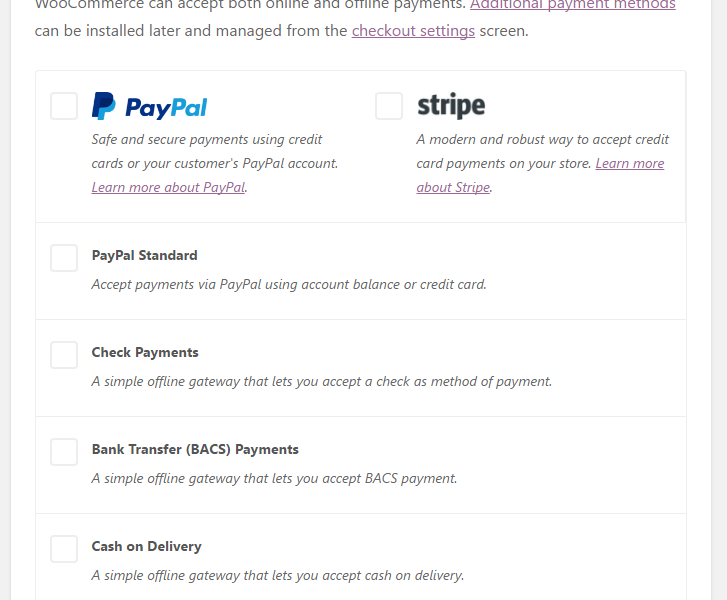
Two of the most popular payment options are at the very top – PayPal and Stripe – it’s highly recommended that you integrate your site with both. Just click on their corresponding checkboxes.
You can also select other payment methods that seem to make sense. There’s going to be even more options available later on in your WooCommerce settings panel.
Note: In order to make online payments work, you need to sign up with either PayPal or Stripe separately. The settings in WooCommerce are only for integrating your existing PayPal and Stripe accounts with your new e-commerce website.
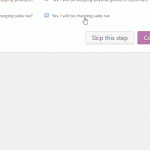
Again, click “Continue” when done.
The next step is just a confirmation screen that everything went well. At this stage, your basic site setup is done – you’ve just built a blank e-commerce store with WooCommerce!
The next step is adding products:
STEP 4. Add your first product
To be able to call your store operational, you need some products in the database (or services, or downloads, or whatever it is that you want to sell).
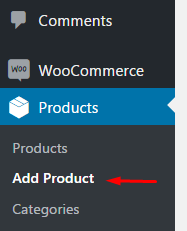
To start working with the products, go to your dashboard, then Products / Add Product:
What you’re going to see is a classic WordPress content editing screen:
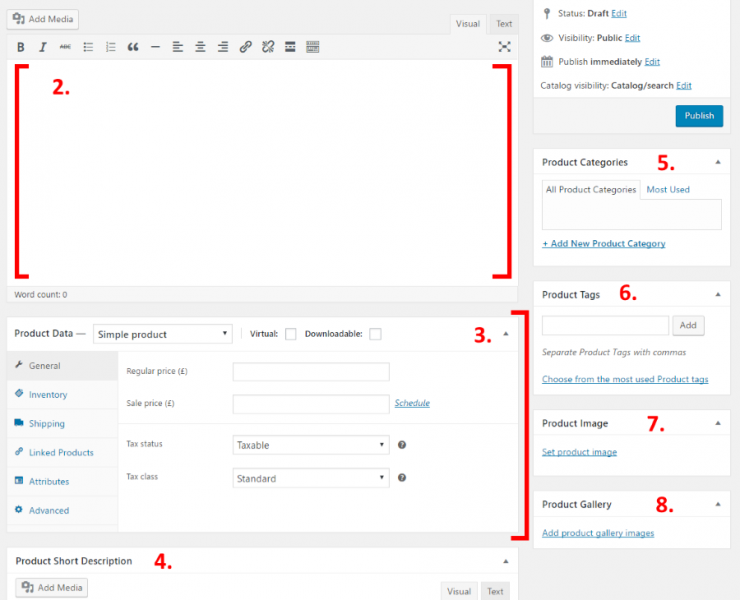
- Product name.
- The main product description. This large field allows you to enter as much info about the product as you wish. Since this is WordPress, you can put not only simple text there but also images, columns, headings, even videos and other media. Basically, whatever you see fit!
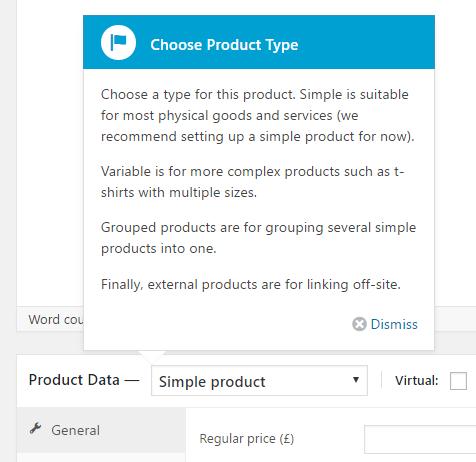
- The central product data section. This one is where you set the type of product that you’re adding, and whether it’s a physical, a downloadable or a virtual product (services are considered virtual products too). As part of this central section, you also get tabs for various parameters of the product:
- General. This is where you get to set the pricing and taxes.
- Inventory. WooCommerce allows you to manage stock levels.
- Shipping. Set the weight, dimensions, and the cost of shipping.
- Linked Products. Great for setting upsells, cross-sales, etc. (Think, “Customers who bought this also bought that.”)
- Attributes. Set custom product attributes. E.g., if you’re selling shirts, you can set alternative colors here.
- Advanced. Additional settings. Not essential.
- Short Description. This is the text that gets displayed on the product page under the name. Works best as a short summary of what the product is.
- Product Categories. Group similar products together. E.g., “hats.” Works just like the standard WordPress categories.
- Product Tags. An additional way to help you organize your database of products. Works just like the standard WordPress tags.
- Product Image. The main product image.
- Product Gallery. Additional product images to showcase its awesomeness.
The first time you visit this panel, WooCommerce will display some handy tooltips to explain what’s the purpose of each field:
Once you’re done setting all of the above, click on the big Publish button – your first product has just been added!
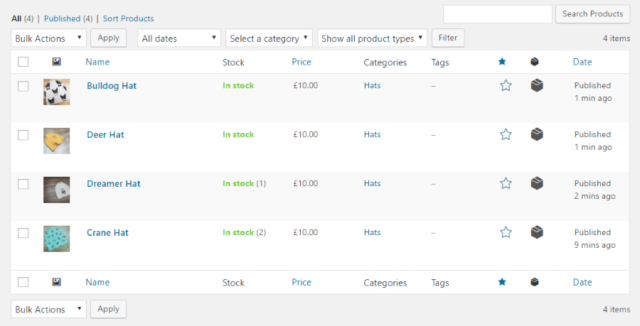
After adding a handful of goods to your database, the products section in the dashboard should look something like this:
STEP 5. Choose a theme for your online store (FREE)
There’s a very good reason why I first covered how to add products to your store, before discussing the visual appearance of the entire thing.
Quite frankly, without any products in the database, you wouldn’t be able to see the individual pages of the store in any representative form. You wouldn’t be able to make sure that everything looks right.
Now that you have most of your products added, we can make sure that things are in order from a purely visual standpoint.
WooCommerce vs your current theme
By default, WooCommerce works with any WordPress theme. This is great news especially if you’ve already picked your design and you want to stick with it.
Alternatively, you can go with special WooCommerce-optimized themes. Those themes come with pre-set styles that make all WooCommerce elements look great.
Here’s my recommendation:

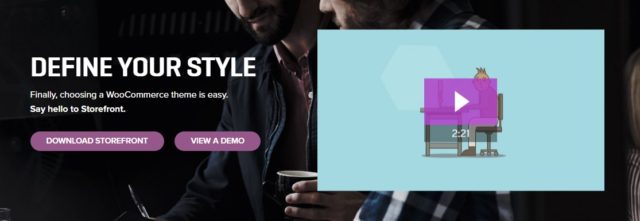
The official WooCommerce theme – and the one that’s the most likely to work properly – is called Storefront. The default version is free, and it should be enough to get you going.
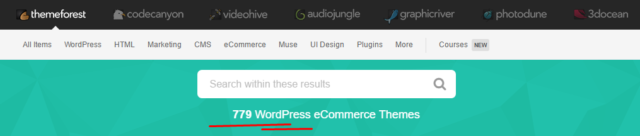
Alternatively, you can visit the e-commerce section at ThemeForest – the biggest directory of premium WordPress themes on the web.
Regardless if you’ve decided to stick with your current theme or have gone for something new and WooCommerce-optimized, what you need to do next is make sure that the individual pages of the store look good. Let’s do that now:
The rules of e-commerce store design
Let’s discuss a handful of important aspects before we get into the nitty-gritty.
Mainly – what makes an e-commerce store design good (read: profitable)? Here are the most crucial parameters:
- The design needs to be clear and not confusing in any way. A visitor who’s confused won’t buy anything.
- The center content block needs to grab the visitor’s attention right after they come to the site. That center block is where the products will be displayed.
- Adjustable sidebars. You need to be able to select how many sidebars you need and also disable the sidebar altogether for some pages (more on that later).
- Responsive and mobile-optimized. Research indicates [2] that around 80% of people on the internet own a smartphone. According to another research [3], 61% of your mobile visitors will leave immediately and go to your competitors if they have a frustrating mobile browsing experience. In other words – making sure that your website is optimized for mobile is crucial.
- Good navigation structure. You want clear menus that are easy to grasp – so that your visitors can find the page they’re looking for.
Having the above in mind, here’s what you can do with the individual pages of the store:
Your shop page
This is where the main listing of your products is found. If you’ve gone through the WooCommerce setup wizard, this page can be found at YOURDOMAIN.com/shop
This is a standard WordPress page – you can edit it via WordPress dashboard / Pages.
The things that are worth doing:
- Add some copy that will encourage your visitors to shop with you.
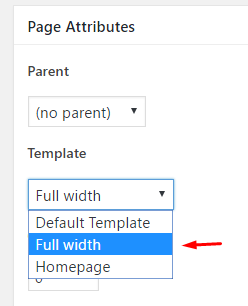
- Decide if you want to have the sidebar on the page. This is done through your theme’s own page templates. For instance, Storefront allows me to go full-width, which I will do:
The main trait of the Shop page is that right below the standard content, it features a custom part where it displays your product listings. This is what it looks like on the Storefront theme:
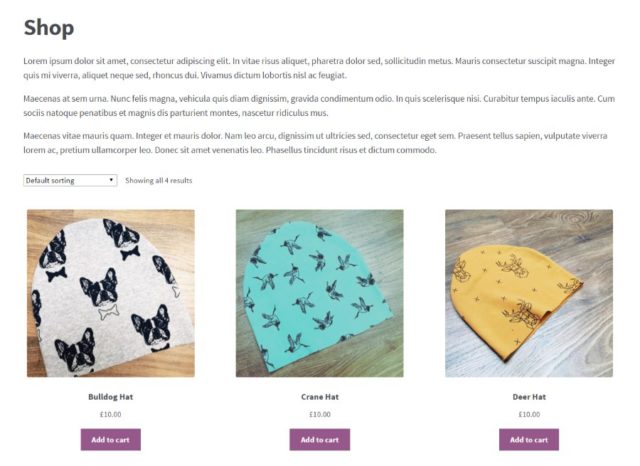
As you can see, nice product images are the key, it’s the first thing that you should get right! In other words – you should probably work on your product images more than on anything else.
WooCommerce also enables you to display your products in alternative ways on this page. When you go to the WordPress dashboard / WooCommerce / Settings / Products and then the Display section:
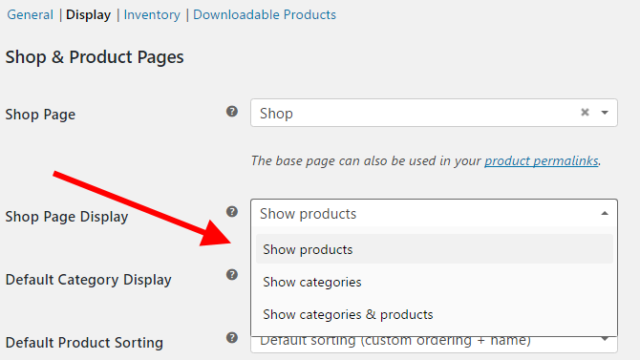
… you can choose whether you want to display individual products or product categories on the Shop page. Select whatever makes the most sense for you, then save settings.
Individual product pages
In order to see those, click on any product listing from the Shop page.
If you’re using a quality theme, you shouldn’t experience any difficulties on this particular page. Basically, the only thing you can do is adjust the amount of text that you’re using for individual product descriptions, to make sure that everything fits visually and that there are no blank spots that could confuse the buyer.
Here’s my example with the Storefront theme (without any additional customization):

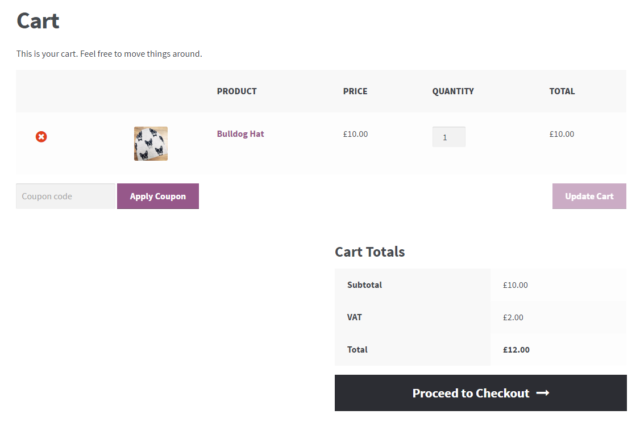
Shopping cart
Another crucial page that can be adjusted through Dashboard / Pages.
The one thing I would recommend is to go for the full-width layout. You don’t want to give the buyer too many options on this page, apart from proceeding to checkout.
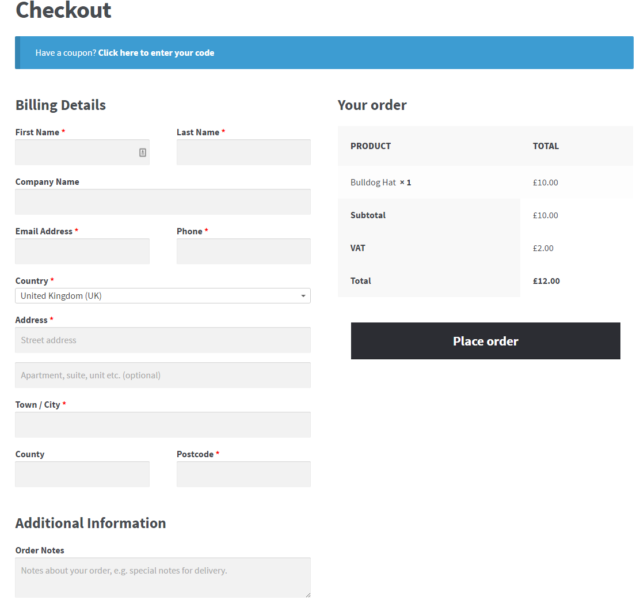
Checkout
Checkout is perhaps the most important page of them all. It’s where your buyers get to finalize their orders and make the payments.
I don’t actually encourage you to do any tweaks to that page apart from one:
The Checkout page absolutely needs to be full-width. The only acceptable way out of the page for the buyer should be to finalize their order, and not get distracted by the things available in the sidebar.
You can do this via Dashboard / Pages (just repeat the process you went through with the Shop page).
Apart from that, the default look of the Checkout page is great:
At this stage, you are basically done with adjusting your store design, now let’s look into the possibilities to extend the store’s functionality.
STEP 6. Extending WooCommerce – How?
One more thing that makes WooCommerce such an impressive e-commerce solution is that there are tens or even hundreds of extensions and plugins available.
Let’s list some of the most useful ones:
WooCommerce extensions
Let’s start with the extensions – the official add-ons that have been approved by the WooCommerce team.
To see what’s available, you can go to this page.
That catalog is truly impressive and vast. I don’t want you to feel intimidated by it. You certainly don’t need all of those extensions. Treat that list as a buffet – pick whatever seems cool.
Some of the more worthy mentions:
- Payment gateways. These extensions allow you to accept more payment methods on top of the standard PayPal. In general, the more methods of payment you can afford to accept (those gateways are often paid), the better.
- Shipping extensions. These are going to be handy if you want to automatically integrate your store with the official shipping rates from companies such as UPS or FedEx.
- Accounting extensions. Integrate your WooCommerce store with the accounting tool of your choice.
- WooCommerce Bookings. Allow customers to book appointments for services without leaving your site.
- WooCommerce Subscriptions. Let customers subscribe to your products or services and pay a weekly, monthly or annual fee.
- EU VAT Number. For those operating within the EU.
- TaxJar. Put your sales tax on autopilot.
Alternatively, if you don’t want to spend any money on new extensions, you can browse around in the free category. There’s more than enough stuff there to keep you occupied.
Plugins that supercharge your e-commerce store
Setting the extensions aside, you can also use other WordPress plugins to further supercharge your store. Here’s what you should get:
- Yoast SEO. Improve the SEO of your whole website.
- Yoast WooCommerce SEO plugin. Improve the SEO of your products and other areas of your e-commerce store.
- WooCommerce Multilingual. Run a fully multilingual WooCommerce site.
- Contact Form 7. Let your site visitors contact you directly.
- UpdraftPlus. Back up all your site content, including your products and other store data.
- Social Share Buttons by GetSocial. Let your buyers share your products with their friends and family through social media.
- MonsterInsights. Integrate your site with Google Analytics.
- iThemes Security. Security presets for your website.
- W3 Total Cache. Speed up your website through caching.
Creating an Online Store in a Nutshell
As you can see, the degree of difficulty when it comes to creating your own e-commerce store with WordPress isn’t high, but it will still take you a while to get through all of the steps above – probably an afternoon or two.
That’s still incredible considering that just, say, five years ago you would need to hire a developer and pay them north of $5,000 to get something similar created. Now you can do everything yourself!
Anyway, to help you get through all the tasks required, here’s a cut-out-‘n-keep checklist:
Before you begin
- Get a domain name, sign up for web hosting, get a working WordPress install running.
- Make sure that your new blank WordPress site works properly (no obvious errors popping up, etc.).
Installing WooCommerce
- Install and activate the main WooCommerce plugin.
- Go through the WooCommerce setup wizard, paying close attention to:
- Getting the four required pages created (Shop, Cart, Checkout, My Account).
- Setting up the store locale.
- Setting up sales tax and shipping.
- Picking initial payment methods.
Products
- Add most (or all) of your products or product categories to the store.
Design
- Select the right WordPress theme for your e-commerce store. Go either with your existing theme or browse through other possibilities. Review the rules of e-commerce store design when doing so.
- Adjust your Shop page.
- Adjust individual product pages.
- Adjust the Cart page.
- Adjust the Checkout page.
Extensions
- Install the payment gateways that you want to use.
- Consider some of the shipping extensions.
- Consider an accounting extension.
- Browse through other extensions and the free category.
Plugins
- Consider installing all of the plugins that will supercharge your e-commerce store:
- Yoast SEO
- Yoast WooCommerce SEO
- WooCommerce Multilingual
- Contact Form 7
- UpdraftPlus
- Social Share Buttons by GetSocial
- MonsterInsights
- iThemes Security
- W3 Total Cache.
Thanks for the wonderful post